STEP TWO: MAKE YOUR FLIP BOOK
We've got the pictures, now we need the book!
- Open PowerPoint.
- On the first slide, type a title -- such as "Pig Smile" -- and your name and the date.
- Click Insert > New Slide.
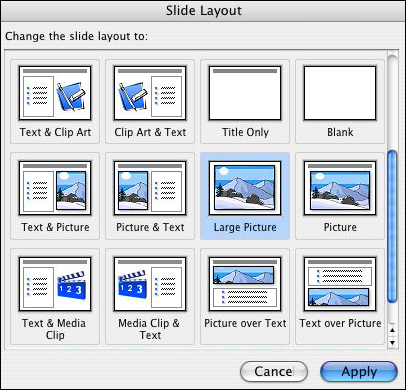
- Click Format > Slide Layout; click the layout called Large Picture; and then click Apply.
- Double-click "Double-click to add picture;" browse to select Pig1.jpg; and then click Insert.
- Click Insert > New Slide to make a new page; double-click on the page; and insert Pig2.jpg.
- Repeat the previous step until you have created seven slides -- a title slide and six picture slides with
one picture on each slide.
- Click Insert > New Slide, and then click Format > Slide Layout. Scroll back up in the Slide Layout window (or
pane) and choose Title Slide and Apply.
- Type "The End".
- You now have created eight slides. Click View > Slide Sorter, you should see something like this:

- Save your work!
Next: Animating the drawings.
|