STEP ONE: DRAW THE IMAGES
Follow -- or invite students to follow -- the directions below:
- Open the drawing program -- KidPix, TuxPaint, AppleWorks, Excel�. (Remember, the only stipulation for the drawing program you use is that you are able to save images either in .jpg or .bmp format, or to copy and paste from the drawing program into PowerPoint.)
- Create a basic image -- the first picture in the "flip book." For this example, we'll draw a pig that's about to laugh at a joke. So, for the first picture, draw a pig with an emotionless smile.
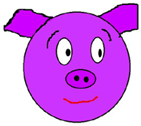
- Click Save and save the image as "pig1.jpg." Be sure to include the number 1 in the file name or you'll have a hard time organizing the animation later.
- Draw another pig identical to the first one, but this time, widen the smile just a little bit. (The smaller each change is, the smoother the final movements will be.)
- Click Save As and name the file "pig2.jpg."

- Repeat the steps above -- making a small change and saving each drawing as a new file -- until you've created six (or more) images.
Next: Making the flip book.
|