STEP TWO: SIZE PHOTOS
Size matters! Digital
camera photos often are very large. If you have the time, try to
save photos in a smaller size (around 400 KB is great). You'll lose
some detail, but the smaller size photos will allow the slide show
to load and run faster.
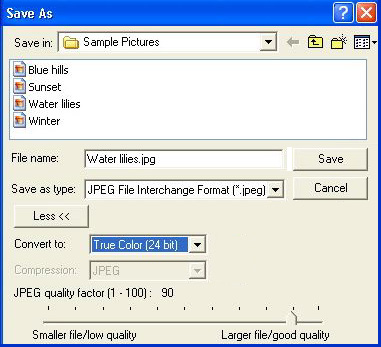
To reduce the size of
photos on a PC, use Photoshop or another photo editing software,
or go to Programs>Accessories>Photo Editor. Click File>Open and
open the photo. Click File>Save As and then decrease the size of
the picture by moving the toggle bar closer to "smaller file/low
quality." Rename the picture something you'll recognize as the smaller
sized photo (SmallBasketballTourn.jpg, for example). Make sure you
save the photo to your project folder, and then click OK.
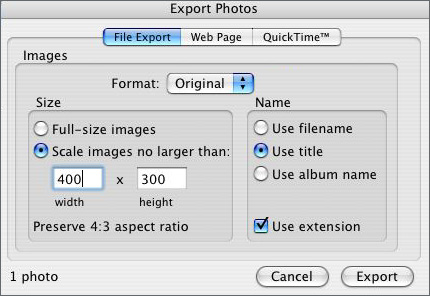
To reduce the size of
photos on a Mac (OS X or higher), click i-Photo, go to File>Import
and import your photo. Click File>Export and reduce the photo size
to about 400 x 300 jpg. Rename the photo something you'll recognize.
Make sure you save the photo to your project folder, and then click
OK.
If you're confused about how to
reduce the size of your photos, you can skip that step, but remember
that you'll need quite a bit of memory if you're adding a lot of
photos.
Next : Inserting
photos.
|

